|
New York Beauty Patterns click here
Paper piecing A New York Beauty Step By Step
** This is my method of making the blocks, sewing the curves, and paper piecing, there are many different
ways, you may wish to try them all to see what works best for you **
Two free patterns found below can be used with the instructions provided, the finished quilt blocks will
measure 7 inches (7 1/2 unfinished)
|
|
If you would like to support this site and free patterns , please consider making a donation through Paypals
secure payment center. Thanks for your help to keep QCC a great (and fun) resource for quilters everywhere!!
|
( Clicking on any picture will open the
image in a larger size for you to see details )
- The first thing you need to do is cut out your templates, lay them out
and fold each in half and mark the center on all sections that will be sewn together.
- Next, Cut a square of fabric large enough for your template C- lay the fabric face down, as shown in picture, place the
paper template on top, face up, and pin to your fabric...After it is pinned well
enough, trim around the template leaving some fabrc past the ¼ inch seam allowance (room for error)
- Now we are going to sew this paper to our fabric, all the way around, inside the ¼ seam allowance (not on
the line) This will give stability when we are sewing the sections together. Remove the pins as you come to them, also I like to use a large stitch width for this part. I’m
really just basting the pattern to the fabric. When you come to the end, do not enclose the stitches, stop about ½ inch before
the start point. This way if you need to loosen your stitches you can just give it a tug and it will have somewhere to go
J
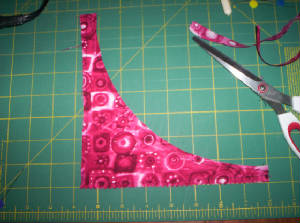
- Now I have sewn all around the section, and basted my fabric on, and I am going to trim all the excess fabric that is
past the seam allowance paper edge, so I have a perfect piece

|


